
How to Reconcile Accounts in QuickBooks Desktop: Step-by-Step Guide
Step 1: Gather Your Bank Statement
Before starting, obtain the most recent bank or credit card statement for the period you wish to reconcile. You will need:
-
Statement ending date
-
Ending balance
-
List of deposits, withdrawals, fees, and interest
Make sure all transactions for the month have been entered or downloaded from your bank feeds.
Step 2: Open the Reconciliation Window
-
Open QuickBooks Desktop.
-
Go to the top menu and click Banking.
-
Select Reconcile.
-
Choose the account you want to reconcile (Checking, Saving, or Credit Card).
-
Enter the Statement Date and Ending Balance exactly as shown on your bank statement.
-
If applicable, enter Service Charges and Interest Earned (with correct date and expense/income account).
Click Continue.

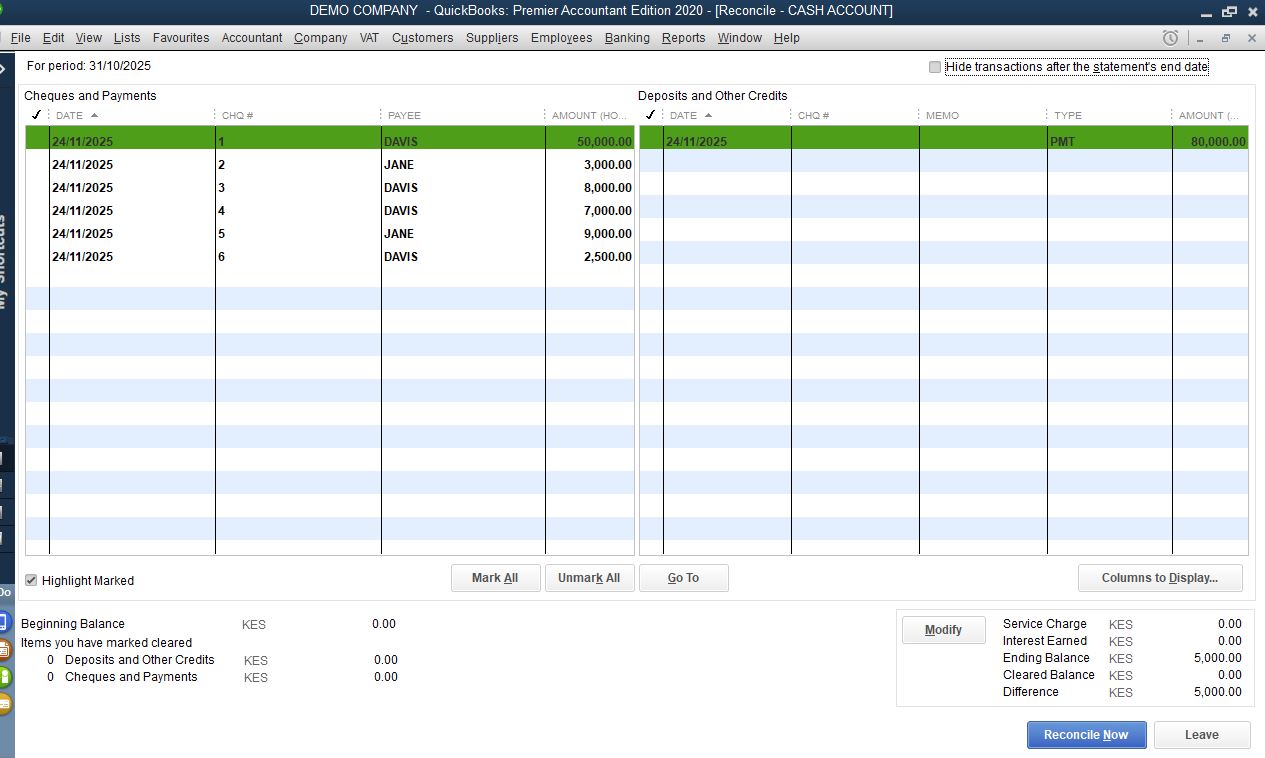
Step 3: Match Transactions
You’ll now see two lists:
-
Checks and Payments
-
Deposits and Credits
Your task is to match transactions in QuickBooks Desktop to those listed on your bank statement.
How to match:
-
Place a checkmark next to each transaction that appears in your bank statement.
-
Ensure the amounts and dates match accurately.
-
Sort by date or amount to find items quickly.
As you check items off, QuickBooks Desktop calculates the Difference (shown in the lower-right corner).
What you want:
Difference = $0.00
This means your QuickBooks Desktop records match your bank statement exactly.
Step 4: Review Discrepancies
If the difference is not zero, there may be issues such as:
1. Missing Transactions
-
Deposits or payments not entered
-
Outstanding checks not yet cleared
2. Incorrect Amounts
-
Typing errors
-
Wrong payment application
3. Duplicate Entries
-
Imported twice through bank feeds
-
Hand-entered then downloaded
4. Bank Adjustments Not Recorded
-
Service charges
-
Interest
-
Returned payments
Use the Locate Discrepancies button to view:
-
Changed transactions
-
Deleted transactions
-
Previous reconciliation differences
Step 5: Complete the Reconciliation
When the Difference shows $0.00, click Reconcile Now.
QuickBooks Desktop will prompt you to:
-
View or print the Reconciliation Report
-
Save a detailed report for your records
This report includes:
-
Cleared transactions
-
Uncleared (outstanding) transactions
-
Adjustments and discrepancies
It’s highly recommended to save or export the report each month for audit purposes.
How to Fix Reconciliation Errors in QuickBooks Desktop
Even with careful work, reconciliation issues happen. Here’s how to fix common problems.
1. Reopening a Previous Reconciliation
If a past reconciliation was done incorrectly:
-
Go to Reports → Banking → Previous Reconciliation.
-
Select the statement you want to review.
-
Print or review the report to identify errors.
2. Using the Reconciliation Discrepancy Report
Go to:
Reports → Banking → Reconciliation Discrepancy
This report highlights changes such as:
-
Deleted transactions
-
Changed amounts
-
Modified dates
If a user changed a reconciled transaction, QuickBooks Desktop flags it here.
3. Resolving Beginning Balance Issues
If your beginning balance is wrong:
-
A previous transaction was edited or deleted
-
Check the Audit Trail Report (Reports → Accountant & Taxes → Audit Trail)
-
Restore the transaction or correct the error
-
Rerun reconciliation
4. Fixing Bank Feeds Duplicates
If the Bank Feeds Center imported duplicate transactions:
-
Exclude duplicates
-
Delete extra entries
-
Match existing ones correctly
Duplicate entries commonly cause discrepancies.
Best Practices for Seamless Reconciliation
1. Reconcile Monthly
Always reconcile within a few days of receiving your statement to reduce confusion.
2. Enter Bank Fees Before Reconciling
Record service charges, interest, and adjustments prior to starting.
3. Use Bank Feeds Wisely
Import transactions but always verify before adding or matching.
4. Avoid Editing Reconciled Transactions
If changes are required, document them and maintain audit trail consistency.
5. Save Reconciliation Reports
Keep digital copies for auditing, tax preparation, or financial reviews.
6. Clear Old Outstanding Transactions
Investigate checks or deposits that never clear — they may need to be voided or corrected.
Conclusion
Reconciling accounts in QuickBooks Desktop is an essential accounting task that ensures your financial data is accurate, reliable, and audit-ready. Although the process is more manual compared to QuickBooks Online, QuickBooks Desktop offers powerful tools for verifying transactions and maintaining clean records.
By understanding the step-by-step process, validating discrepancies, and following best practices, you can perform accurate reconciliations every month and maintain strong financial control over your business. With consistency and attention to detail, reconciliation becomes a smooth, predictable part of your bookkeeping routine.
Leave a Reply: